- WEMScontroller3.
- Run Channel Setup Wizard To Configure Analogue Input.
- Configure Fuel Tank Control Points.
This guide covers the first-time setup of an Fuel Tank, and assumes that a WEMScontroller3 has already been discovered and that the Channel Setup Wizard has already been run.
- Click the Fuel Tank icon on the Floorplan, in the Safety/Metering Layer.
![]()
Fuel Tank icon
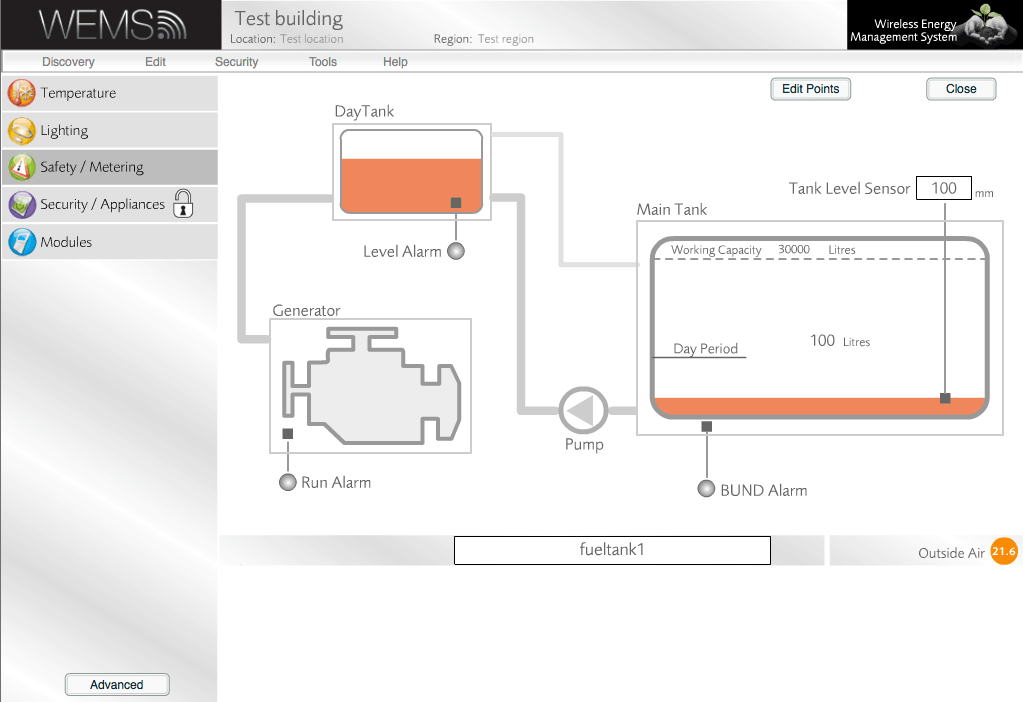
The Fuel Tank Control Screen will appear.
- Click to view and edit the inputs used to control the Fuel Tank.

Fuel Tank Control Screen
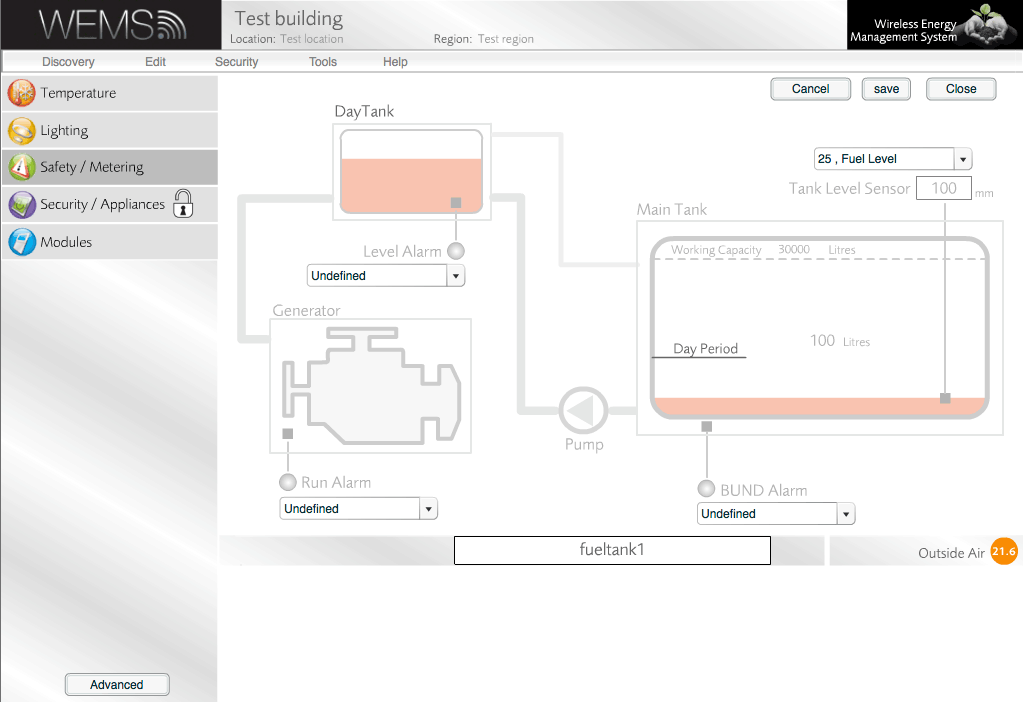
- The Control Screen will display dropdown menus for the Fuel Level input (populated automatically) and digital alarms. These alarms are:
- Top left: Day Tank Low Alarm
- Bottom left: Engine Running
- Bottom right: Main Tank Low Alarm
- To save changes to these settings, click ; otherwise, click . Both buttons will return the Control Screen to view-only mode.

Fuel Tank Control Screen in editing mode
- To view and edit settings in the Fuel Tank Advanced Panel, click .
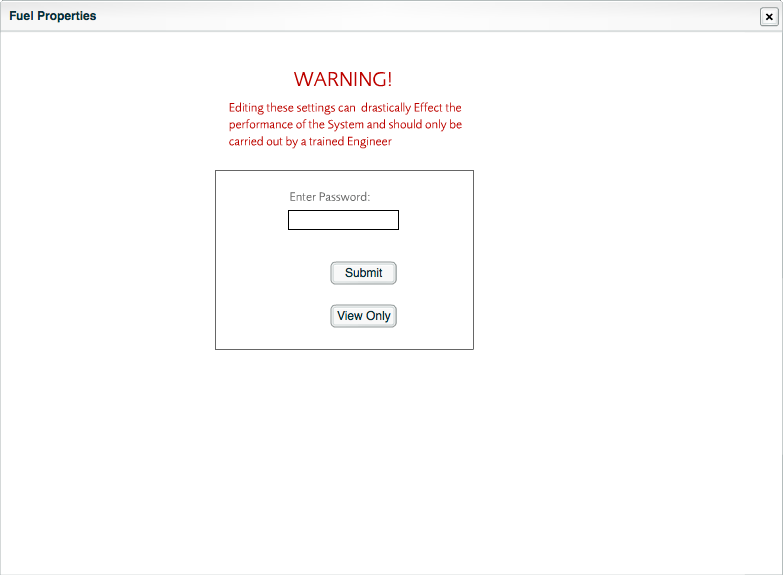
Because of the nature of these settings, a warning window is displayed when the button is clicked. An administrator password (not the same as the login password) is required to change the settings, but it's possible just to view the settings without entering the password, by clicking the button.

Fuel Tank Advanced Panel prompt for administrator password
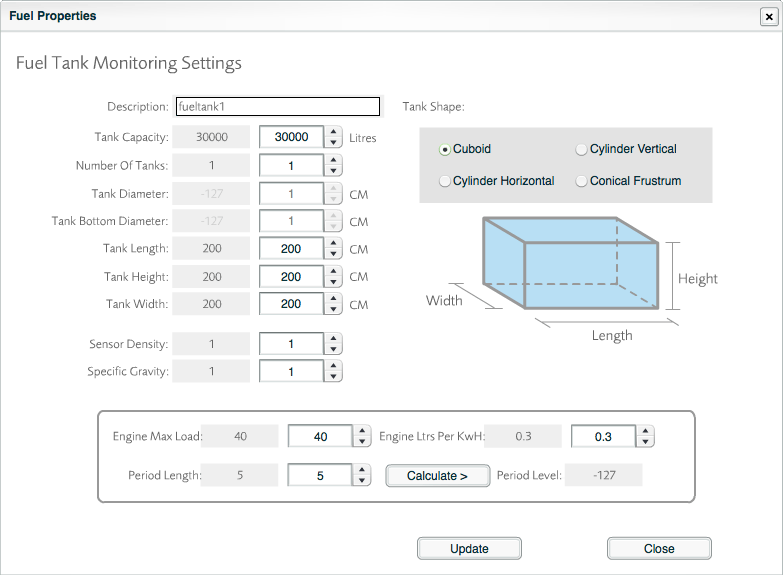
- Edit the advanced settings as required in the Fuel Tank Advanced Panel. A guide to each setting is shown in the table below.

Fuel Tank Advanced Panel
| Description | Name of the Fuel Tank Object. |
| Tank Capacity | Maximum amount of liquid in litres that the tank can hold. |
| Number Of Tanks | If there is more than one tank, a single tank is built in the system and the values are multiplied by the number of tanks specified here. |
| Tank Diameter | Diameter in cm. Option disabled for Cuboid tanks. |
| Tank Bottom Diameter | Diameter of bottom of tank in cm. Option disabled for Cuboid, Cylinder Vertical and Cylinder Horizontal tanks. |
| Tank Length | Length in cm. Option disabled for Cylinder Vertical and Conical Frustum tanks. |
| Tank Height | Height in cm. Option disabled for Cylinder Horizontal tanks. |
| Tank Width | Width in cm. Option disabled for Cylinder Vertical, Cylinder Horizontal and Conical Frustum tanks. |
| Sensor Density | Relates to the type of Pressure Transducer in use. Some can measure multiple liquid types and some can measure only one liquid type (usually water). The value is selected from the same scale as Specific Gravity. |
| Specific Gravity | A relative measure of the gravity of the liquid being measured when compared with pure water. Specific gravity examples:
|
| Tank Shape | Choose the shape of the tank (example diagrams update as each shape is selected). The chosen option will disable measurement options that are not relevant to the selected shape. |
| Engine Max Load | Maximum number of Amps that the engine can support. |
| Period Length | Maximum number of days that the engine is designed to run for. |
| Engine Ltrs Per kWh | Amount of fuel in litres used by the engine to output 1kWh. |
| Period Level | Litres of fuel required to run the exchange for the Period Length. To update the Period Level, change settings for Engine Max Load, Period Length and/or Engine Ltrs Per kWh, and then click Calculate. |
- If any changes have been made, click to save the changes, and then click to return to the Control Screen.
- Finally, click on the Control Screen to return to the Floorplan.