It is best practice to create a Metering Schedule only after you have first created all necessary meters on the Safety/Metering Layer, as the Schedule will need to be assigned to a meter in order to function.
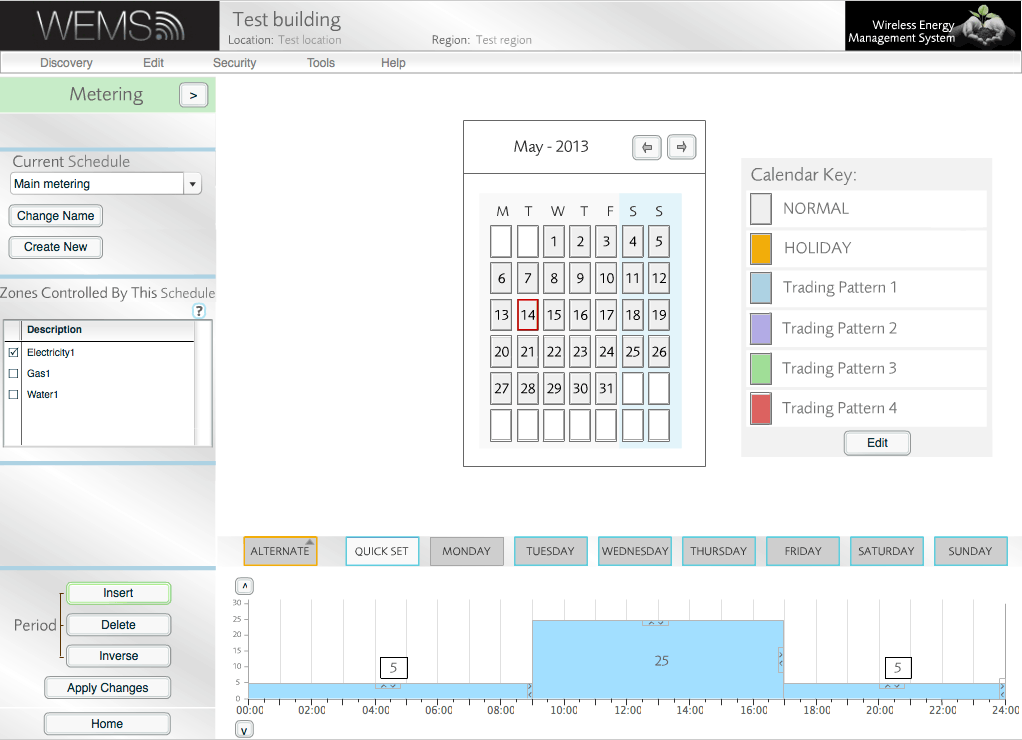
Objects on the Safety/Metering Layer do not have normal Schedules attached to them. Instead, Metering Schedules are used to create thresholds which then can be sent as alarms. Here is an example:
For a shop that opens 9–5, the majority of energy is used between those hours. An appropriate Schedule of thresholds may look like this:
- 00:00–09:00 = 5kWh (store closed)
- 09:00–17:00 = 25kWh (store open)
- 17:00–24:00 = 5kWh (store closed)
If actual usage goes beyond these thresholds, an alarm is sent to the Estate Manager.
If a threshold is assigned to a meter, it is viewable as an overlay on the metering logs of the Metering page.
To Create A Metering Schedule
- Go to | .
- Select Metering, using the arrow in the top-left corner.
- Click .
- Enter a meaningful name for the new Schedule.
- Click .
- Modify the blocks in the graph to produce a Schedule that suits your requirements.
Drag handles on each side of the blocks can be used to alter the value and period of each part of the Schedule. The and buttons in the Period section can be used to add and remove blocks to and from the graph.
The values in the Metering Schedule are arbitrary. Units are assigned when the Schedule is attached to a meter. For example, the Schedule below is attached to an electricity meter, which is set up to measure in kWh. The values in this Schedule therefore relate to kWh.
- In the Zone Description box, tick all the meters to which you would like to apply the new Metering Schedule.
- Click (if it appears), and then click to exit the Schedules screen and return to the Floorplan.
