To set up a WEMS system, you must create a Floorplan. This defines the floors and rooms that make up the property. The Floorplan is essential in order to define the relationships between the WEMS equipment and the other controllable devices/outputs in the property.
- To begin, Launch The WEMS User Interface.
If a Floorplan has not been created already, you will be prompted to create one through the first-time setup wizard, which is shown below.
- Click Continue to begin the first-run wizard.
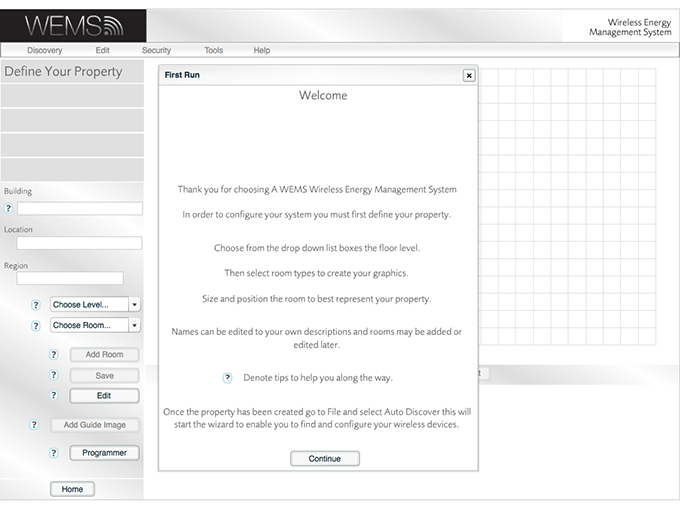
You will now be presented with the Define Your Property screen.
- Enter names in the Building, Location and Region text fields. The values entered will later be presented along the top of the user interface, in order to confirm which property is being viewed. All three values can be changed after the Floorplan has been created.
- Select options from the
 Choose
Level… and
  Choose
Room… dropdown menus. Select the largest
room on the Floor
first.
All new rooms 'float' on top of the other rooms on the Floor. Create the largest room on the Floor first. Create the smallest room on the Floor last.
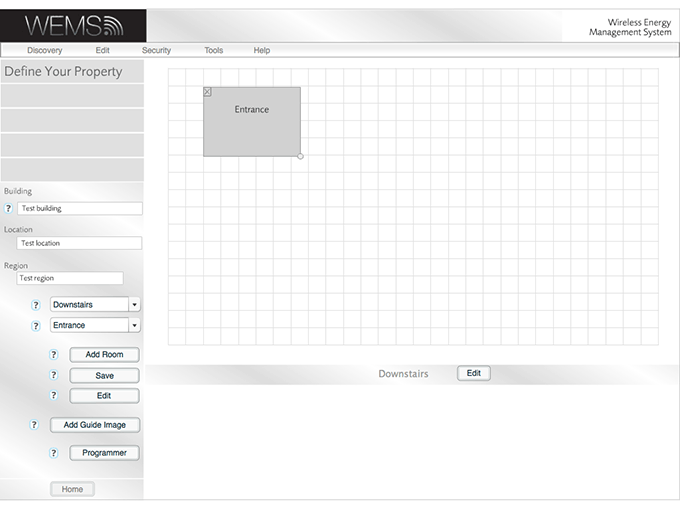
- Click the button in the left-hand panel and then click (greyed out until the Edit button is clicked).
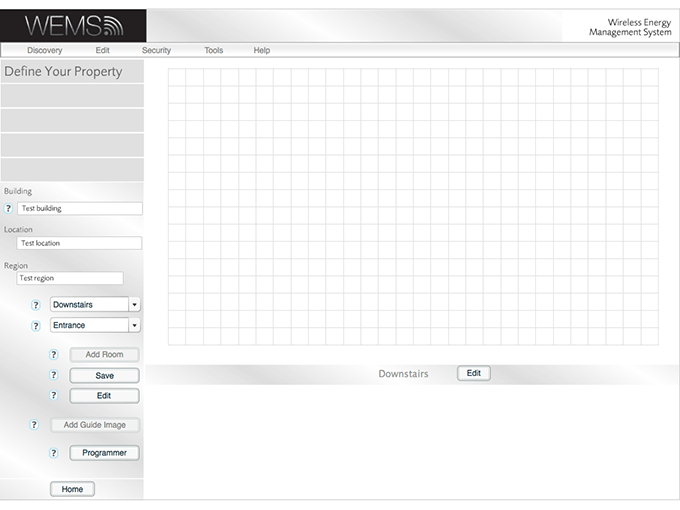
A new room will appear on the grid.
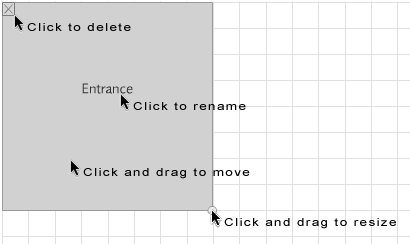
Delete, Rename, Move Or Resize A Room
- Delete the room by clicking the 'x' in the top-left corner. Note that rooms can be deleted only if they contain no Objects, Zones or devices/outputs.
- Rename the room by clicking the label in the middle and overtyping a new name.
- Resize the room by clicking and dragging the circle in the bottom-right corner of the room.
- Move the room by clicking and dragging the blank, grey area of the room.
To rename the Floor, click the button beneath the grid, type a new name and then click .
Delete, rename, move or resize
Adding More Rooms And More Floors
Once you have created and positioned the room as required, you can go on to create additional rooms. Clicking the button creates a new room with the same name as the previous one, with a number suffixed to distinguish the rooms, e.g. Entrance 2, Entrance 3. These additional rooms can be renamed as shown above, but remember to use unique names for each room.
Alternatively, choose a different room name from the Choose Room… dropdown menu and then click in order for a room with that name to be added to the current Floor.
As soon as the Floor has been populated with all of the rooms it contains, you can move on to creating the rooms on the other Floors of the property (assuming that there is more than one Floor).
Select an appropriate Floor from the Choose Floor… dropdown menu (the grid will go blank as the new, empty Floor is shown) and then click to create a new room on the new Floor.
The process of creating rooms on each Floor of the property can now be repeated until all rooms and all Floors have been defined.
Setting The Location Of The WEMSprogrammer
Once all rooms and all floors have been defined, you need to specify the location of the WEMSprogrammer.
- Click the button in the left-hand panel.
- From the dropdown menu choose the location of the WEMSprogrammer, and then click .
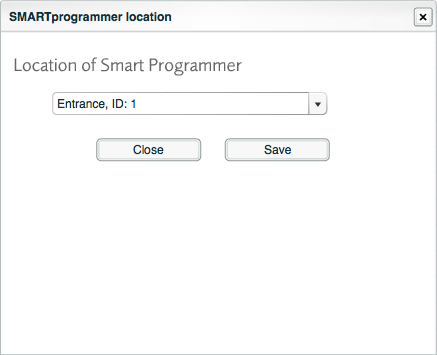
The Floorplan is now complete. Click the button in the bottom-left corner to close the Define Your Property page and return to the main user interface.
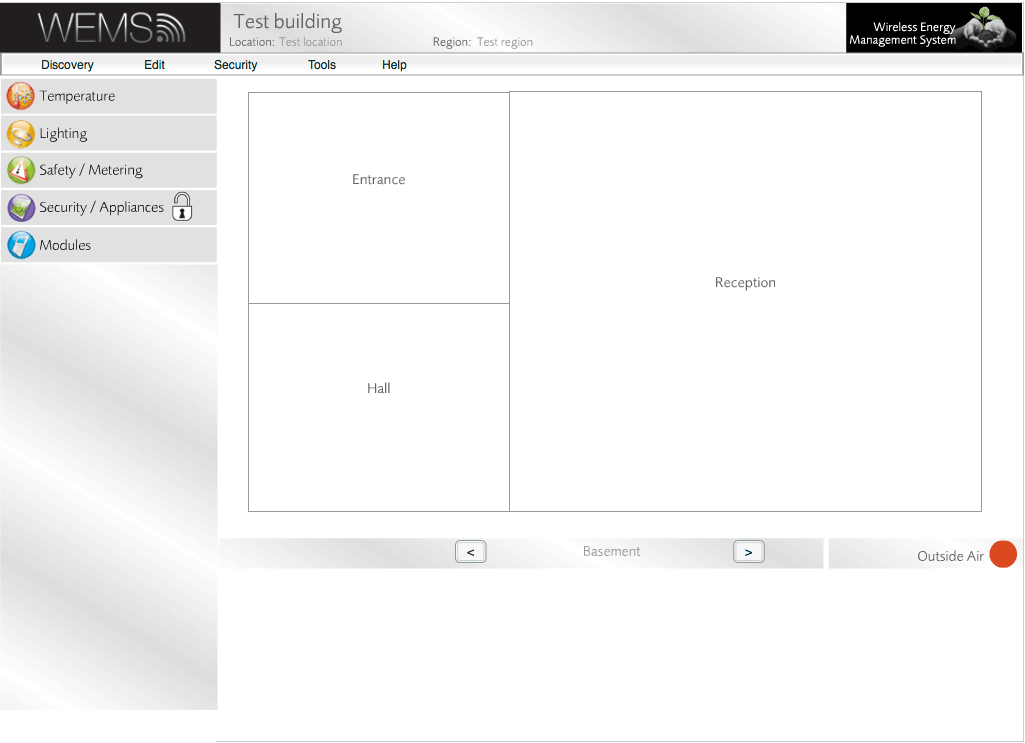
Floorplan shown in main user interface
Room Notes
Notes can be added for each room on the Floorplan. From the main user interface, click the name of any room, write a note, and then click Update.
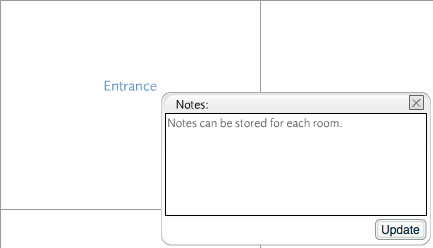
Adding notes to a room
Next Steps
With the Floorplan complete, you can begin to populate it with WEMS controllers, sensors and outputs.
For more information, see Building A System.